Contribution Guidelines
Overview of project's development workflow
HomelabOS follows a common Open Source Software development workflow. A core group of maintainers handle the branching, merging and tagging of releases. While this core group shepherds the overall project, everyone is welcome to contribute. This document goes into detail on how you can contribute.
Submitting Merge Requests
All work should start with an issue on GitLab. After creating a detailed issue, it's usually best to wait a day or two before beginning work, to gather feedback from the community.
A good MR is small and changes as few lines of code as possible to resolve the issue. Multiple smaller separate MRs are ofter better than one big MR that touches multiple areas of the code. They're easier to review, test, and merge.
A large MR with several unrelated fixes in it can be held up from being merged because of one particular thing that only affected one piece of the MR. Had they been separate MRs, only the MR that has a problem or needs a change will be held up.
Contribution overview
To contribute a bug fix, service, or enhancement you'll need to:
- Establish and maintain a Fork
- Branch Dev in your fork
- Develop your feature/fix
- Commit to your branch on your fork
- Create a Merge Request
Getting set up to contribute
To set yourself up to contribute to HomelabOS, you'll need a working understanding of Git, and a Gitlab account. Those prequisites are left as an exercise to the reader.
-
Create your own fork by clicking the "Fork" button at https://gitlab.com/NickBusey/HomelabOS:

-
In your fork, goto Settings/Repository -> "Mirroring repositories" and setup mirroring of NickBusey/HomelabOS
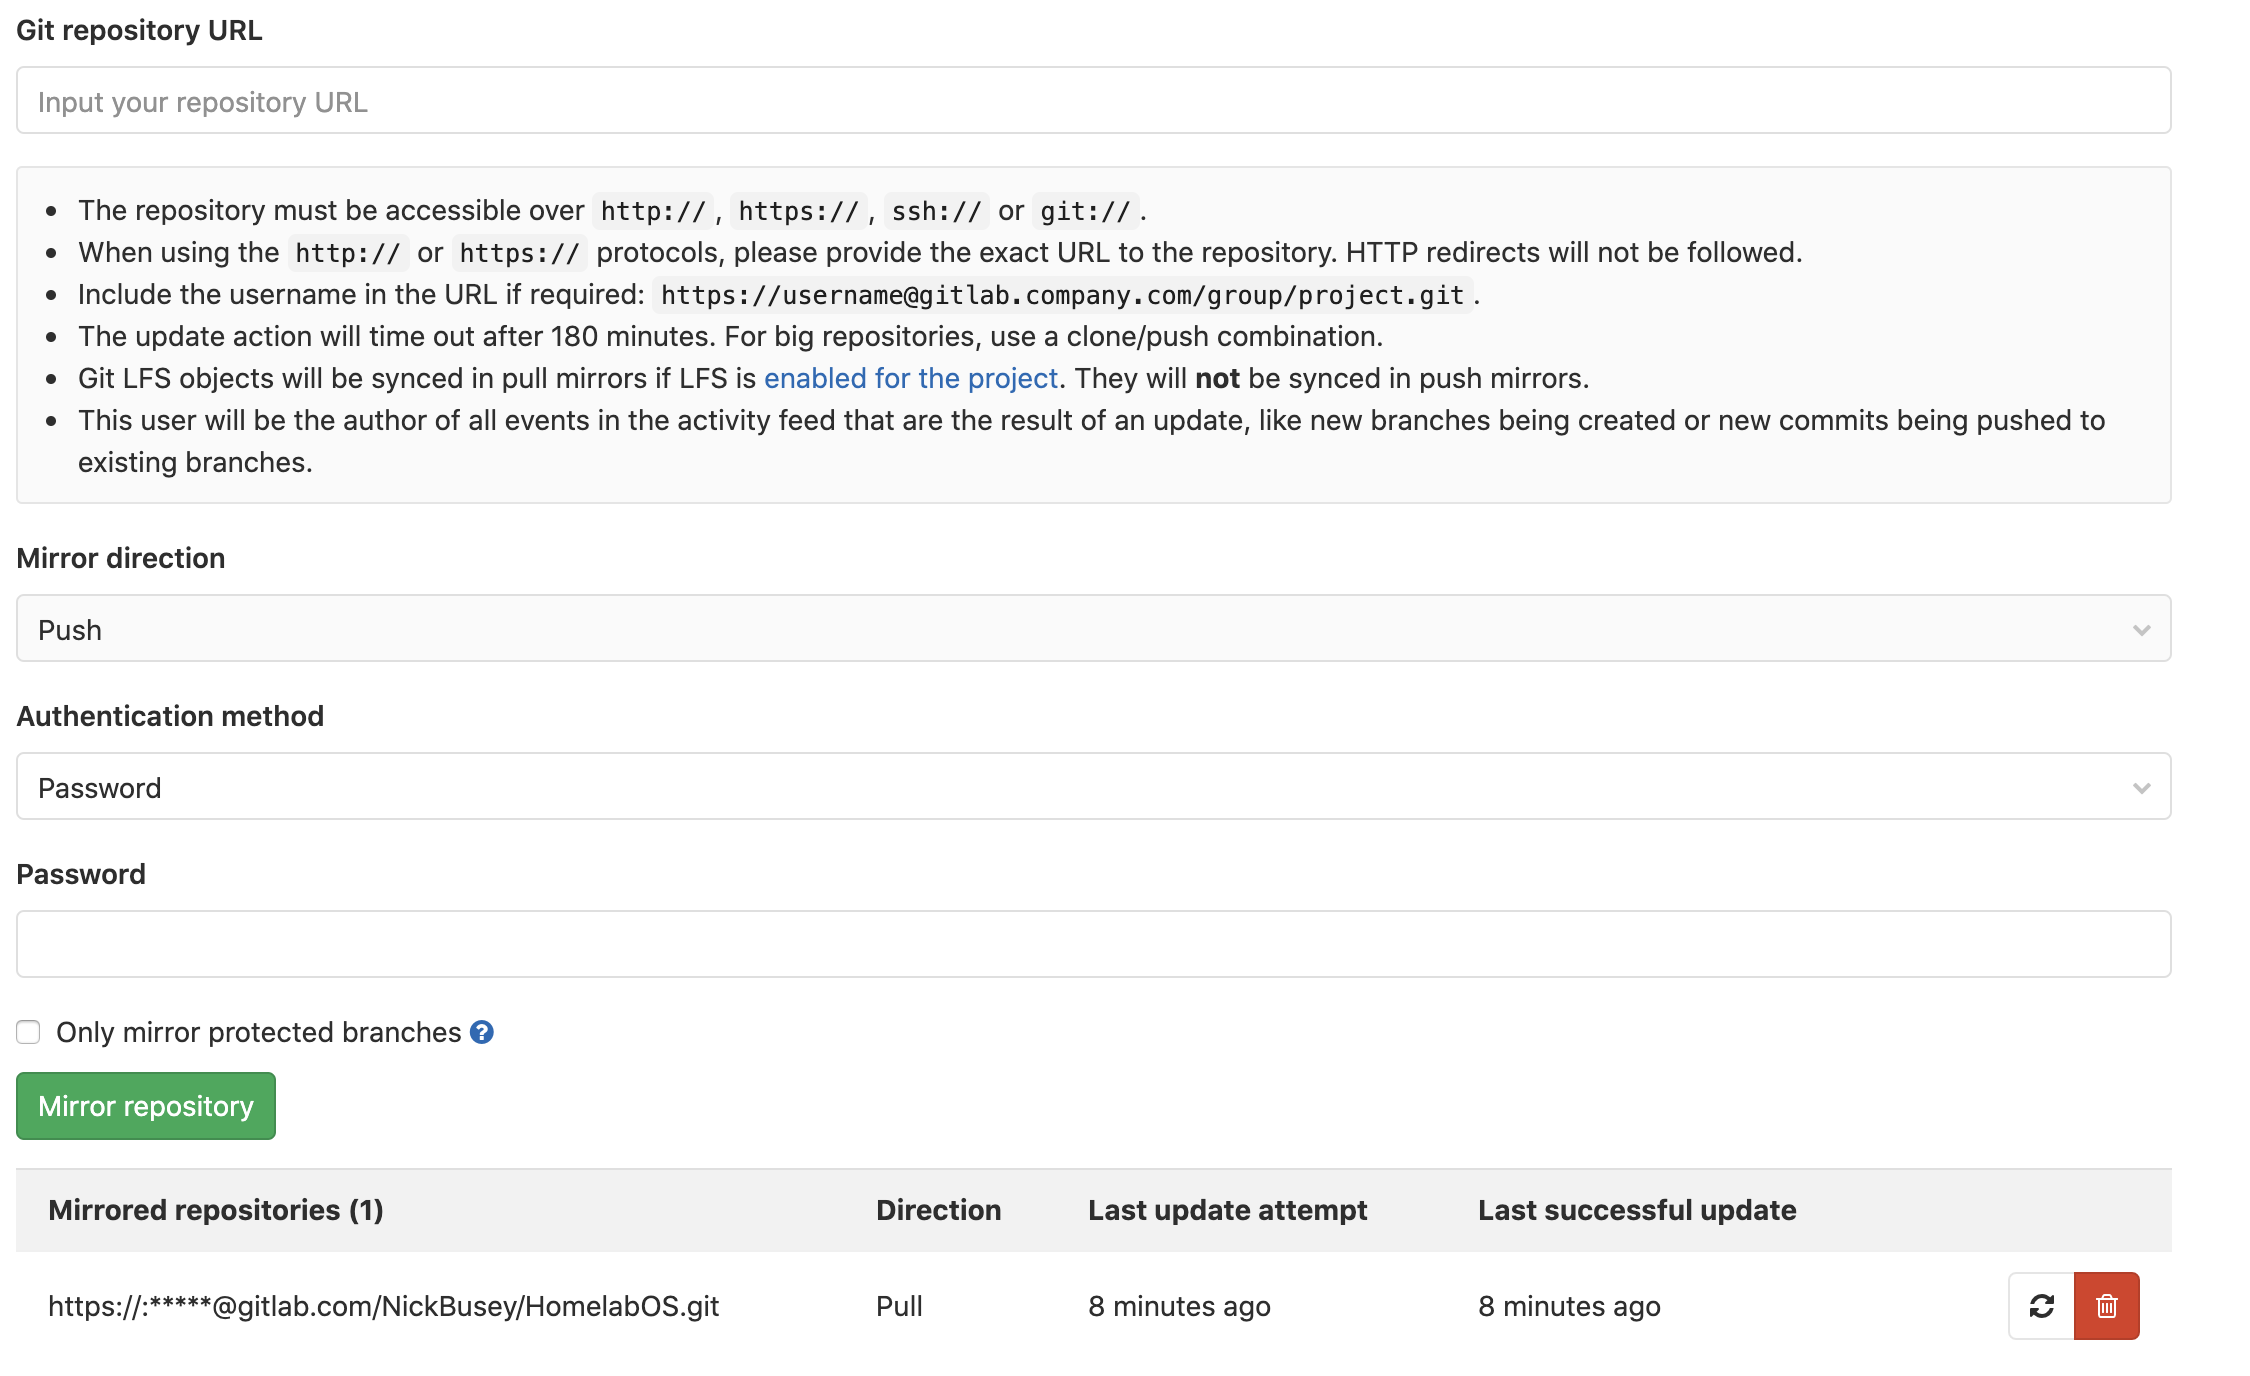
Mirror direction = Pull Only mirror protected branches = enabled
-
Then set your Protected Branches in Settings/Repository -> "Protected Branches" like this
 (you can ignore CODEOWNER though) you can even set push to "no one" so you can't accidentally push to that branch.
Making a contribution to an existing Issue
Gitlab is great for tracking changes to source code, but it relies on the developer who made the changes to push those changes to gitlab. Because of this, the first rule of contributing to an existing issue, is to Communicate with the original issue creator. It helps everyone involved if you handle that communication through comments on the issue itself. Once you and the original author(s) are on the same page, the following git steps will help you check out the branch and submit changes.
- Make sure you don't have any outstanding un-related changes in your local repository with
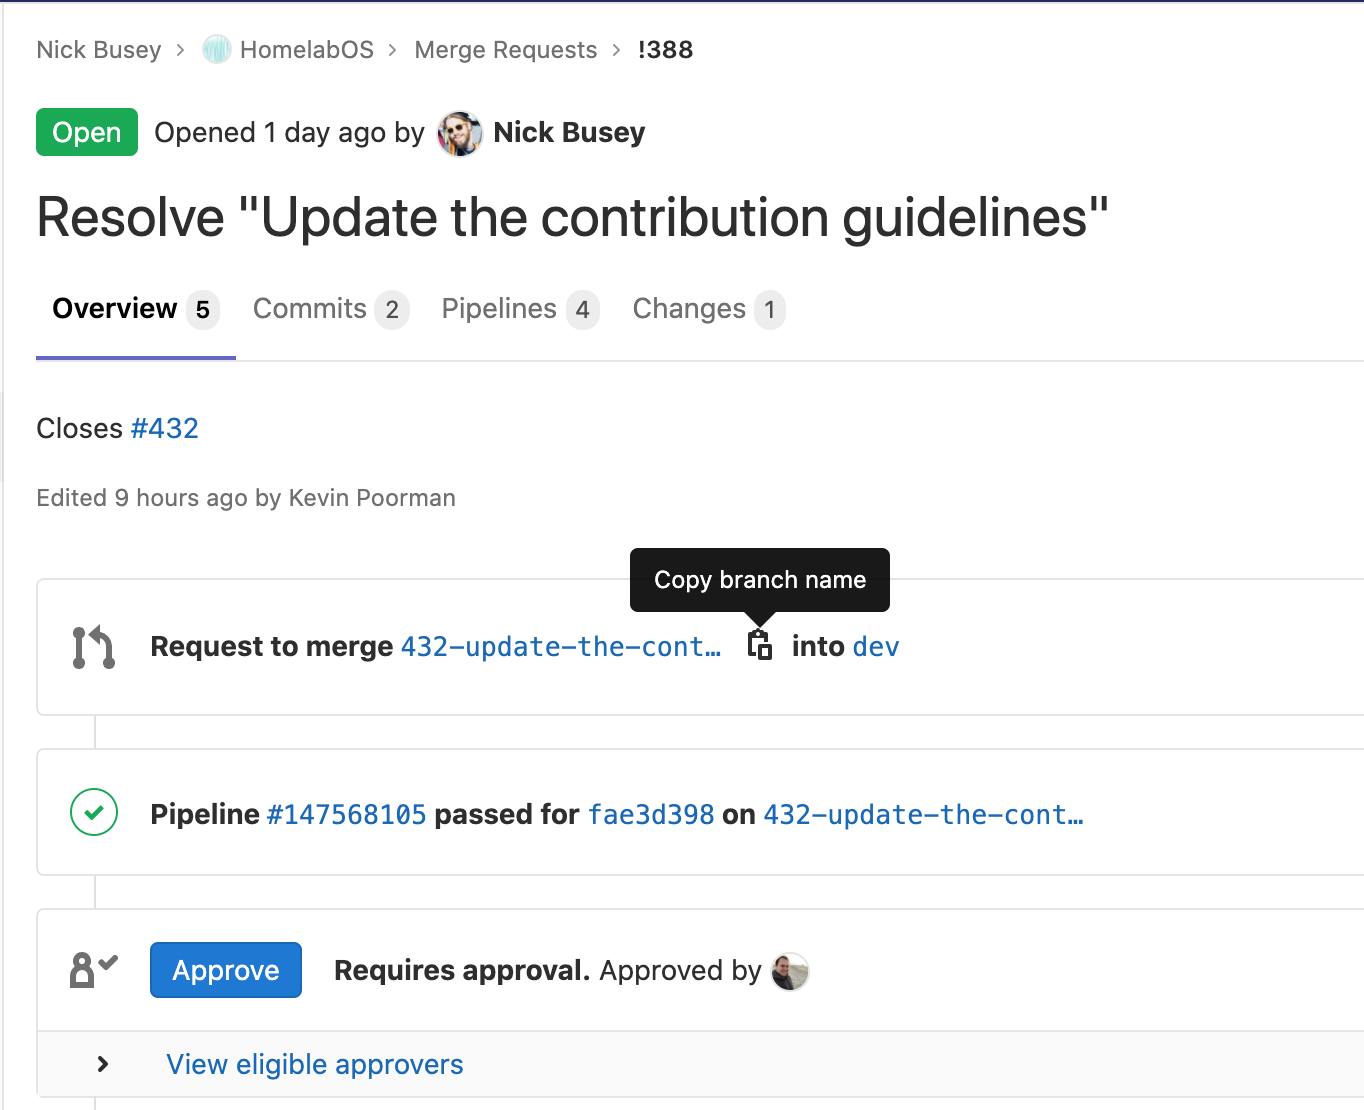
git status. You should seenothing to commit, working tree clean. - Identify the branch name by navigating to the issues' linked Merge Request and clicking the copy icon next to the Branch name.
- Run
git fetch origin - Run
git checkout <<branch name>> - Make your changes
- Commit and Push
Making a contribution to a new Issue
- Make sure you don't have any outstanding un-related changes in your local repository with
git status. You should seenothing to commit, working tree clean. - Create an issue in the master project GitLab. From this issue, click the
Create Merge Requestbutton. - Now click the
Check Out Branchbutton and copy Step 1, run that command on your local copy of the repository. - Now make your changes and commit and push them.
- In GitLab, go to your Merge Request and make sure it is not labeled WIP and that all the check boxes are checked (If applicable).
Once you've submitted the MR it will be reviewed, and if it receives 2 approvals, it will be merged. You don't need to do anything after submitting unless requested. Don't worry about rebasing, or closing the merge request. If the Merge Request needs changes, the maintainers will add commends describing the needed changes, add WIP: back to the start of the title, and assign it back to the submitter.
If/When you are ask to rebase run:
git checkout devgit pullgit checkout your-new-featuregit rebase dev
Before submitting a merge request install pre-commit (optional)
Quote from Pre-Commit
Git hook scripts are useful for identifying simple issues before submission to code review. We run our hooks on every commit to automatically point out issues in code such as missing semicolons, trailing whitespace, and debug statements. By pointing these issues out before code review, this allows a code reviewer to focus on the architecture of a change while not wasting time with trivial style nitpicks.
Installation instructions
Before you can run hooks, you need to have the pre-commit package manager installed.
Using pip:
Run pip install pre-commit
Using homebrew:
brew install pre-commit
Install the git hook scripts
cd to the folder from where you run make,
run pre-commit install to set up the git hook scripts.
(optional) Run against all the files
pre-commit run --all-files
Working with Issues
Labels
enhancement is for any issue that changes how HomelabOS itself deploys/operates.
package is for new packages people would like added to HomelabOS. These should not be marked as enhancements.
bug is for bugs. :)
Developing Locally with Vagrant
You can play around with the stack locally without needing an actual server to spin it up against.
First run make config as normal. The local IP and SSH username are not used for Vagrant, so they can be
for your real server, or fake. For What is the domain you have pointed at your Homelab server with ports 80 and 443?:
enter localhost.
Now run make develop to spin up a local instance inside a Vagrant machine.
For easy access to the services run vagrant ssh -c "cat {{ volumes_root }}/homelab_hosts". Append the output of this to your
machine's host file (usually /etc/hosts). Now you should be able to access http://servicename.localhost:2280/
where servicename is the name of any services you have enabled in config.yml.
If you make changes to the Ansible scripts you can run make provision to run them again.
To deploy just one service you can run make update_one SERVICE_NAME e.g. make update_one zulip
To run just one set of tags you can run make tag TAG_NAME e.g. make tag tinc
[client]$ make web - Spins up a development stack
[client]$ make lint - Run linting scripts
Working locally on the documentation
To serve the docs locally run make docs_local.
Working locally on the website
To work on the HomelabOS website just type make web to serve it locally.
Running the Tests
Requirements: Golang installed and working.
From the root directory: go run .